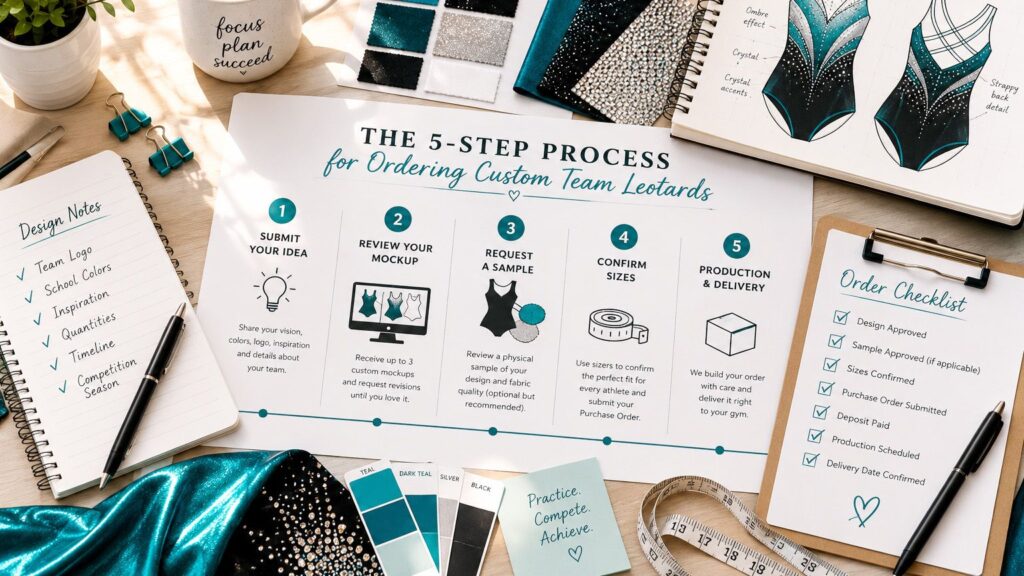
5 Step Process for Ordering Custom Team Leotards: A Complete Walkthrough for Coaches

Ordering custom team leotards is very different from buying uniforms off the shelf. When you purchase ready-made apparel, you’re choosing from existing designs, available sizes, and current inventory. The process is relatively simple.

Custom team apparel is different. You’re creating something unique for your athletes, selecting colors, refining design details, confirming sizes, and coordinating timelines. While the process involves a few more steps, it also gives your team the opportunity to wear a uniform that truly represents your program.

If you’ve already decided that custom apparel is the right fit for your gym, you’re probably wondering:

  • How long does the process take?

  • When do we choose sizes?

  • Do we get to see the design before ordering?

  • Can we request a sample?

  • What happens after we approve the artwork?

In this guide, we’ll walk through the entire process, from your first design idea to the moment your order arrives at your gym.

Why Ordering Custom Is Different From Buying Off-the-Rack

Custom apparel isn’t built from existing inventory. Every order is created specifically for your team. That means the process includes a few important stages before production begins:

  • Design development

  • Design approval

  • Sample review (when applicable)

  • Team sizing

  • Production

  • Delivery

Each step exists for a reason: to help ensure your athletes receive uniforms that look great, fit properly, and arrive on time. The good news is that once you understand the process, it’s surprisingly straightforward.

Step 1: Submit Your Team’s Design Idea

Every project starts with an idea. Some coaches arrive with detailed sketches and inspiration boards. Others simply know they want something modern, elegant, or different from what they’ve worn in previous seasons. Both approaches work.

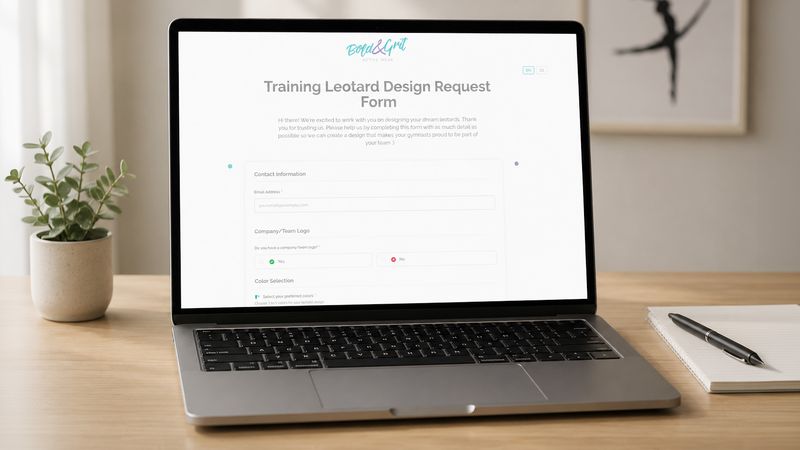
For training leotards, the easiest way to begin is by completing our free proposal form.

What to Include in Your First Message

The more information you provide, the easier it is for our design team to understand your vision.

Helpful information includes:

  • Team name

  • Team logo

  • Preferred colors

  • Approximate quantity

  • Inspiration images

  • Previous uniforms

  • Design preferences

  • Timeline

Don’t worry if you don’t have every detail figured out. The goal isn’t to submit a perfect design. The goal is to establish a clear creative direction.

A Note About Competition Leotards

Competition leotards often require additional design considerations, including crystal placement, budget discussions, and performance requirements. Because of this, competition projects typically begin through direct communication with our team rather than through a standard online form. Your advisor will help guide you through the process and answer any questions before design work begins.

Step 2: Review Your Custom Mockup

Once we receive your request, our design team begins creating concepts based on your goals and inspiration.

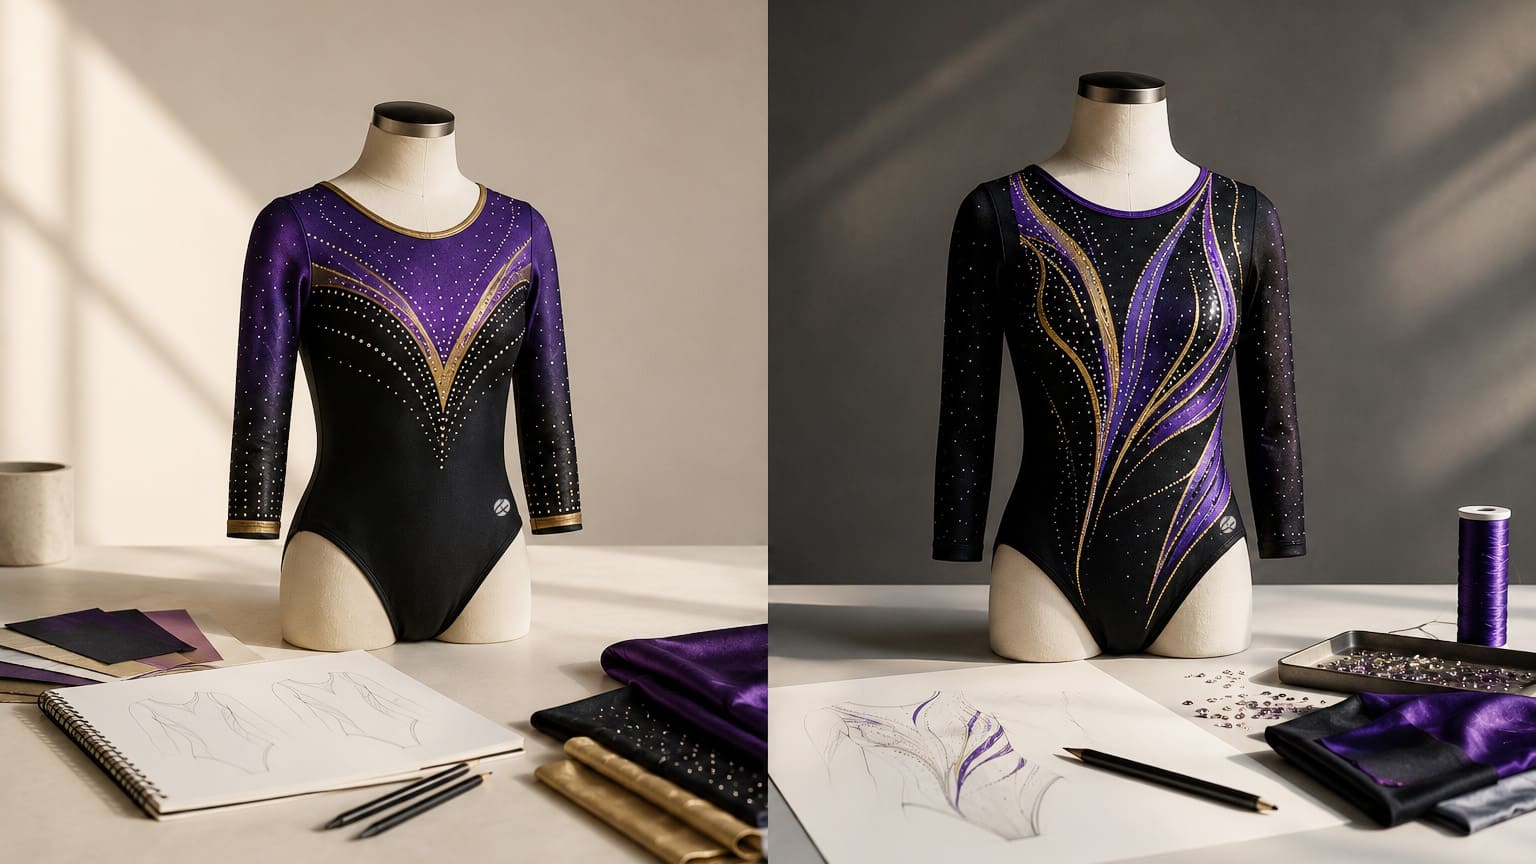
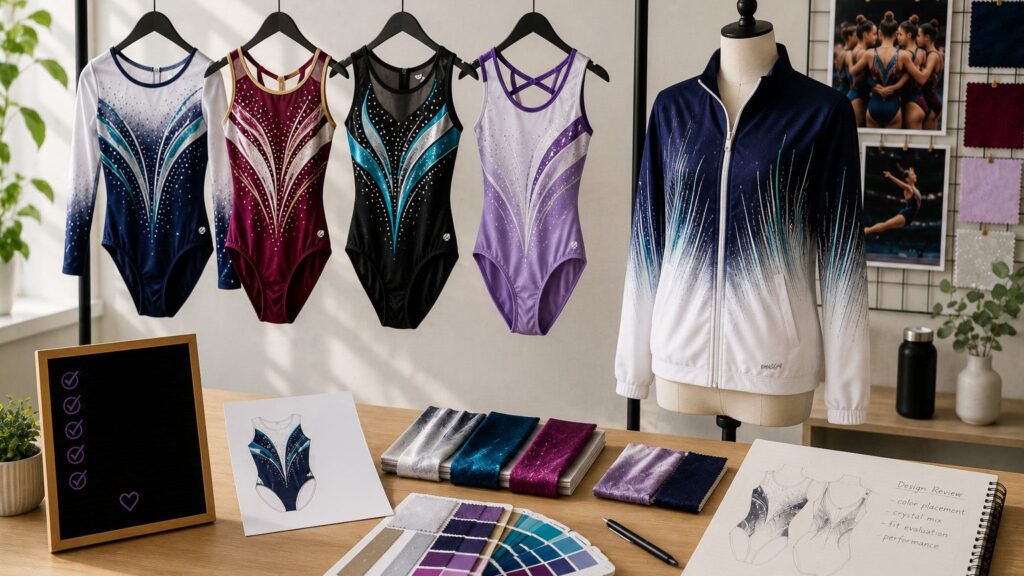
At Bold&Grit, we provide up to three initial design proposals, allowing coaches to explore different creative directions before selecting a favorite.

After reviewing the proposals, you’ll have the opportunity to provide feedback and request revisions.

Many teams reach a final design within one to three rounds of revisions.

The most successful projects gather all feedback before submitting revision requests. This helps our designers make multiple updates at once and keeps the project moving efficiently.

Once everyone is happy with the design, the artwork is approved and the project moves to the next stage.

Step 3: Request a Free Sample (Optional but Recommended)

One of the biggest concerns coaches have is: “What if the final product doesn’t look or feel like we expected?” That’s why we offer a free sample program for many custom projects.

A sample allows your team to evaluate:

  • Fabric quality

  • Construction

  • Overall fit

  • Printing quality

  • Design execution

For many coaches, seeing and touching a physical garment provides additional confidence before moving into full production.

Important Timing Considerations

While we highly recommend reviewing a sample whenever possible, it’s important to understand that samples require additional time. If your team is working with a very tight deadline, producing a sample may not be feasible without affecting your delivery date.

In those situations, your advisor will help determine whether it’s best to proceed directly to production or adjust the timeline to accommodate sample approval. The earlier you begin the process, the more flexibility you’ll have to include a sample review.

Step 4: Use Sizers and Confirm Team Sizes

Once the design is approved, and after sample review, if applicable, we move into sizing. This is one of the most important stages of the entire process. Rather than relying exclusively on size charts, we send physical sizing garments to your gym whenever possible. These sizers are selected based on the products you’re ordering.

For example:

  • Bomber jacket order? We send bomber jacket sizers.

  • Specific leotard back design? We send that back style whenever available.

  • Unisex apparel? We send unisex fit samples.

Athletes can try on garments during practice, allowing coaches to make sizing decisions with greater confidence. This process significantly reduces the risk of sizing errors later. Once sizing is complete, you’ll submit your final Purchase Order with athlete sizes and quantities. At this point, all major decisions have been finalized and production can begin.

Step 5: Production and Delivery

Once we receive your approved Purchase Order and the initial 50% payment, your order enters production.

Unlike mass-produced apparel, every garment is manufactured specifically for your team. Because we produce in our own facility, we maintain direct oversight of every stage of the process, helping ensure consistency, quality, and attention to detail from start to finish.

During production, we:

  • Cut fabrics

  • Print graphics

  • Assemble garments

  • Apply embellishments and crystals (if applicable)

  • Perform quality control inspections

  • Prepare the shipment

Once production is complete, your order is carefully packed and shipped directly to your gym.

Your advisor will provide tracking information once the order leaves our facility.

Handling Common Roadblocks

Even well-organized projects occasionally encounter challenges.

Here are some of the most common situations we see.

Missing Sizes

Sometimes athletes miss the sizing session. When this happens, we recommend completing sizing as early as possible and identifying missing athletes before submitting the final Purchase Order.

When Should You Start the Process?

One of the biggest mistakes teams make is waiting until they urgently need uniforms. The earlier you begin, the more options you’ll have.

Starting early provides time for:

  • Design exploration

  • Team feedback

  • Sample review

  • Sizing sessions

  • Production

  • Shipping

It also reduces stress for coaches, athletes, and parents. If your athletes need uniforms for a specific competition season, it’s always better to start the conversation sooner rather than later.

Creating Custom Team Apparel Doesn’t Have to Be Complicated

At first glance, ordering custom team apparel can seem overwhelming. In reality, it’s a straightforward process when each step is approached one at a time.

From your initial design request to the day your order arrives, every stage is designed to help your team receive uniforms that reflect your identity, fit properly, and perform beautifully.

Ready to get started?

Submit your free proposal form today and take the first step toward creating custom team leotards your athletes will be proud to wear.

From First Idea to Approved Mockup: A Coach’s Walkthrough of the Custom Design Process

Designing custom gymnastics leotards for your team can feel exciting, and a little intimidating.

Many coaches have a clear vision for their program but aren’t sure how to turn that vision into a finished design. Others know they want something unique but have no idea where to start.

Do you need a sketch?

Should you know exactly where every crystal goes?

How many revisions are normal?

What happens if you don’t like the first design?

The good news is that creating custom team apparel is much easier than most coaches expect.

In this guide, we’ll walk through the entire custom team leotard design process, from your first idea to the moment your mockup is approved for production.

Whether you’re designing your first custom leotard or looking for a better experience than you’ve had with previous vendors, this article will show you exactly what to expect.
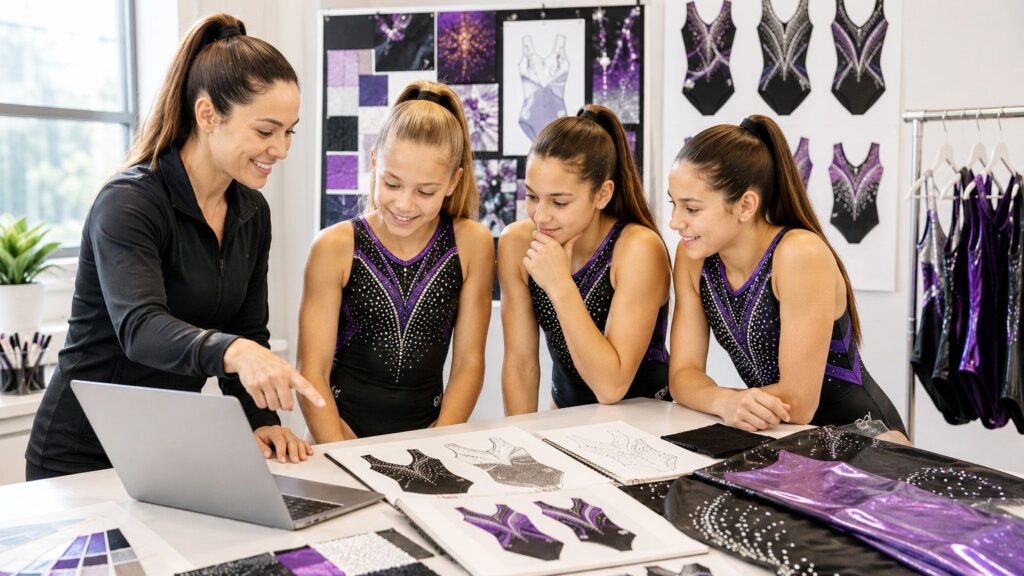
Before You Reach Out: What to Bring

One of the biggest misconceptions about custom apparel is that you need a fully developed design before contacting a manufacturer.

You don’t.

In fact, most coaches start with little more than a few ideas.

Before submitting a design request, it helps to gather:

  • Team colors

  • School or gym logo

  • Inspiration photos

  • Favorite leotard styles

  • Competition themes

  • Brand guidelines (if applicable)

  • Examples of designs you love—or dislike

Some coaches send a detailed sketch. Others send screenshots from Pinterest and write, “Something like this, but make it our own.” Both approaches work.

The more information you provide, the easier it is for designers to understand your vision, but you don’t need to have every detail figured out before reaching out.

Sending Your First Design Request

Once you’re ready to begin, you’ll submit your design request. At Bold&Grit, the process is intentionally simple, but spending a little time gathering ideas beforehand can make a big difference.

We’ll typically ask for:

  • Team name and logo

  • Preferred colors

  • Approximate quantity

  • Inspiration images

  • Notes about what you’re hoping to create

Before submitting your request, we encourage coaches to have an initial conversation with their athletes and staff about the overall direction of the design.

What style are you looking for?

Elegant or bold?

Classic or modern?

Minimalist or heavily embellished?

Do you want geometric elements, ombré effects, metallic accents, florals, animal-inspired details, or something completely different?

The clearer your vision is, the easier it is for our designers to create concepts that align with your expectations from the very beginning.

That doesn’t mean you need a finished design. Many teams come to us with a collection of inspiration images, favorite colors, and a general idea of the look they’re trying to achieve.

If you’re not sure where to start, our design team can absolutely help guide the process and suggest creative directions. However, narrowing down your preferences early helps avoid situations where the design feedback shifts dramatically from one concept to another. For example, it’s difficult to create a focused design process if one round is inspired by jungle animals and the next is inspired by neon bubbles.

The goal of the first submission isn’t to provide a finished design. It’s to establish a clear creative direction that allows our designers to develop concepts that truly reflect your team.

How Our Designers Translate Your Idea Into a Mockup

Once we receive your request, our design team begins transforming your ideas into visual concepts. This is where experience matters. Professional sportswear designers don’t simply copy inspiration photos. Instead, they look for recurring themes, preferences, and visual cues that help communicate your team’s identity.

For example:

A coach might say: “We want something elegant, modern, and different from what we’ve worn before.”

Another coach might say: “Our school mascot is a tiger, but we don’t want the design to look childish.”

Both requests provide valuable creative direction.

The designer then combines those inputs with construction knowledge, color theory, performance considerations, and current trends to create initial concepts.

At Bold&Grit, we provide up to three initial design proposals so coaches can explore different creative directions before choosing a favorite.

This stage is often where teams realize possibilities they hadn’t even considered.

What a Good First Mockup Looks Like

Many coaches expect the first mockup to be perfect. In reality, the first mockup is usually a starting point.

A successful first mockup should:

  • Capture the overall direction

  • Reflect your team’s identity

  • Demonstrate the color palette

  • Show key design elements

  • Provide enough detail to guide feedback

Think of the first mockup as the first draft of a conversation. Sometimes coaches fall in love with the very first concept. More often, the first version helps identify what the team likes and what should be refined. The purpose of the first mockup is not perfection. The purpose is alignment.

Giving Feedback That Gets You Closer Faster

This is where many design projects succeed or stall. The best feedback is specific.

Instead of saying: “I don’t like it.”

Try saying:

  • Can we make the shoulders more elegant?

  • We’d like less black and more royal blue.

  • The crystal pattern feels too busy.

  • Can the lines feel more dynamic?

Specific feedback gives designers clear direction. Another helpful strategy is explaining why something doesn’t work.

For example: “Our athletes prefer cleaner designs.” Or: “We want something that feels more collegiate.” The more context you provide, the easier it becomes to move toward the final design.

How Many Rounds Are Normal (And When to Push Harder)

One of the most common questions coaches ask is:

“How many revisions should I expect?”

Most teams reach a final design within one to three rounds of revisions. At Bold&Grit, we include up to three revision rounds as part of the design process.

The good news is that each revision round can include multiple comments and requested changes. We encourage coaches to gather feedback from all relevant stakeholders and submit a consolidated list of revisions whenever possible.

Why does this matter?

Each time a design is revised, it re-enters our design team’s workflow. If a coach requests one change, waits for the updated mockup, then requests another small adjustment, waits again, and later requests a third modification, the timeline can quickly become much longer than necessary.

For example:

  • Round 1: “Can we invert the colors?”

  • Round 2: “Can we make the logo larger?”

  • Round 3: “Can we change the neckline?”

While these are all reasonable requests, handling them separately adds additional design time to the process.

A much more efficient approach is to collect all feedback first and submit it together. For example:

  • Invert the colors

  • Increase the logo size

  • Modify the neckline

  • Adjust the crystal placement

This allows our designers to address everything at once and move the project forward much more quickly.

The most successful projects typically have one primary decision-maker who gathers feedback from coaches, athletes, and administrators before sending consolidated comments to the design team.

This keeps the process organized, reduces unnecessary delays, and helps teams reach an approved design faster.

Approving the Mockup: What Changes After Approval

Once the final mockup is approved, the design phase is complete and the project moves into sizing and order preparation.

At this stage, we’ll send your sizer kit so athletes can try on garments and coaches can confidently determine the correct size for each team member. Because the design has already been approved, we can provide sizing samples that closely match the style, fit, and construction of the final product whenever possible.

After the sizing process is complete, you’ll submit your final purchase order with athlete sizes, quantities, and any additional details needed to move the project into production.

By separating design approval from sizing, teams can focus on one decision at a time and move through the process with greater confidence and accuracy.

Frequently Asked Design Questions

Do I Need Drawing Skills?

Not at all. Many of our best projects started with simple descriptions and inspiration photos.

Can You Match Our Existing Team Colors?

Yes. Providing color references, logos, or previous uniforms helps us create the closest possible match.

What If My Athletes Can’t Agree on a Design?

This is very common. We recommend narrowing options down to two finalists before collecting feedback from the team.

Can We Combine Ideas From Multiple Designs?

Absolutely. Many final designs are created by combining favorite elements from several concepts.

What If We’ve Never Ordered Custom Apparel Before?

That’s perfectly normal. Our team guides coaches through every stage of the process, from the initial concept to final approval.

Bringing Your Vision to Life Doesn’t Have to Be Complicated

Designing custom gymnastics leotards should be exciting, not overwhelming.

The best projects don’t start with perfect sketches or detailed technical drawings. They start with a vision, a conversation, and a team willing to explore creative possibilities.

With the right design process, coaches can move from a rough idea to an approved mockup with confidence, knowing every step is designed to make the experience as simple and collaborative as possible.

Ready to get started?

Submit your free design proposal today and discover how easy it can be to create a custom leotard that truly represents your team.

Team Leotard Sizing. How to Size a Gymnastics Team Accurately Without Guesswork

Ordering custom leotards for an entire gymnastics team is exciting, until sizing becomes part of the conversation.

Most coaches are comfortable evaluating designs, choosing colors, and coordinating athlete preferences. But when it comes to determining the correct size for 12, 20, or even 100 gymnasts, uncertainty quickly appears.

What if an athlete falls between sizes? What if a gymnast grows before competition season? What if multiple leotards arrive and several athletes need exchanges?

These concerns are common, and they’re one of the biggest reasons coaches hesitate before placing a custom order.

In this team leotard sizing guide, we’ll walk through the challenges of sizing a gymnastics team, explain the most common mistakes, and show how a structured sizing process can dramatically reduce errors before production begins.

If you’re exploring options for custom team gymnastics leotards, this guide will help you approach sizing with confidence.

Why Team Sizing Is Harder Than Individual Sizing

Sizing a single athlete is relatively straightforward. Sizing an entire gymnastics team is a completely different challenge. Unlike individual retail purchases, team orders often involve:

  • Athletes of different ages and body types

  • Growth spurts during the season

  • Multiple training groups

  • Parent involvement

  • Coaches managing dozens of measurements simultaneously

  • Tight production timelines

Even when athletes know their current clothing size, gymnastics apparel fits differently than everyday clothing.

A gymnast who wears a youth medium in regular apparel may need a completely different size in a competition or training leotard depending on torso length, body proportions, and fit preference.

This is why relying solely on estimated sizes often creates problems later. The larger the team, the greater the risk that small sizing inaccuracies multiply across the entire order.

The Hidden Cost of Sizing Errors (And Why Coaches Lose Sleep Over This)

When coaches think about sizing mistakes, they usually think about athlete comfort. In reality, the consequences go much further. Incorrect sizing can create:

Delays Before Competition Season

If athletes receive leotards that don’t fit properly, teams may need exchanges or alterations, which can create unnecessary stress before important events.

Additional Administrative Work

Every sizing issue requires communication between coaches, athletes, parents, and vendors. For busy coaches already managing practices, travel plans, and competitions, this quickly becomes time-consuming.

Athlete Dissatisfaction

Gymnasts want to feel confident in their uniforms. A leotard that feels too tight, too loose, or restrictive can affect comfort and confidence during training and competition.

Budget Impact

Sizing corrections after production may involve shipping costs, rush production fees, or replacement garments depending on the situation. Most coaches would rather spend extra time upfront preventing errors than solving them later. That’s why an organized sizing process is so important.

How Most Teams Handle Sizing Today (And Where It Falls Short)

Many gymnastics programs still use one of the following approaches:

Using a Size Chart Only

The coach distributes a size chart and asks athletes or parents to submit measurements.

While this seems simple, it introduces several variables:

  • Measurements may be taken incorrectly

  • Parents may use different techniques

  • Athletes may round measurements

  • Fit preferences vary significantly

Even small measurement inaccuracies can affect sizing recommendations.

Ordering Based on Current Apparel Size

Another common method is asking athletes what size they currently wear. The problem is that sizing varies between brands. A gymnast’s current leotard size from another manufacturer doesn’t always translate perfectly to a new custom uniform. Even within the same brand, different styles or back designs can fit differently, so the size may not always be the same.

Guessing Based on Previous Orders

Some teams simply reorder the same sizes used in prior seasons. While this may work for returning athletes, it becomes much less reliable when gymnasts experience growth spurts or when new athletes join the team. These methods aren’t necessarily wrong, but they all rely on assumptions. The most accurate approach involves physically trying on garments before finalizing sizes.

Introducing the Bold&Grit Sizer Kit: How It Works

To help coaches eliminate sizing uncertainty, we offer a sizer kit process for team orders. Instead of relying exclusively on measurements or size charts, athletes can physically try on sample sizes before production begins. This allows coaches to make sizing decisions with significantly more confidence.

What’s in the Kit and How We Ship It to Your Gym

Once your project moves forward, we prepare a sizer kit tailored to the specific products included in your order.

If you’re ordering bomber jackets, we’ll send bomber jacket sizers. If you’re ordering gymnastics leotards with a specific back design, we’ll provide sizers featuring that same back style whenever available. Need a unisex fit? We’ll send unisex sizing samples. Our goal is to make the fitting process as accurate and representative as possible.

In cases where your design is based on a brand-new pattern or style that is not yet available in our sizer inventory, we’ll send the closest available sample and clearly explain any fit differences your team should consider when selecting sizes.

The kit is shipped directly to your gym so athletes can complete fittings in a familiar environment during practice. This approach eliminates much of the guesswork and allows coaches to evaluate fit across multiple athletes in a single session.

Many teams find that a brief, organized fitting session provides far more reliable results than collecting measurements individually or relying solely on size charts.

Step-by-Step Sizing Session With Your Athletes

A typical sizing session looks like this:

Step 1: Schedule a Team Fitting

Choose a practice day when most athletes will be present.

Step 2: Organize Athletes by Age Group

This helps streamline the fitting process and reduce waiting time.

Step 3: Try Multiple Sizes When Needed

If an athlete falls between sizes, coaches can compare options directly.

Step 4: Evaluate Fit in Motion

Gymnasts should move naturally during the fitting process.

Basic stretching and gymnastics movements often reveal fit issues that aren’t obvious while standing still.

Step 5: Record Final Sizes

Once the correct size is identified, coaches simply document the selection for each athlete.

This process creates a much more accurate sizing outcome than relying on estimates alone.

Once your athletes have been fitted, you’ll complete your purchase order with the final sizes for each athlete and submit it to our team.

We recommend taking the time to review all sizes before submitting the order, especially for athletes who are between sizes or expected to experience significant growth before the season begins.

Once we receive your purchase order, those sizes become the basis for production. Our team will review the order and may reach out if we notice anything unusual or have questions about a particular size selection.

This process helps ensure that production begins with the most accurate sizing information possible, giving coaches greater confidence that athletes will receive uniforms that fit as expected.

When to Size Up vs. Size Down: Sport-Specific Tips

One of the most common questions coaches ask is: “Should we size up or size down if an athlete is between sizes?” The answer depends on several factors.

Consider Growth Timing

For younger athletes expected to grow significantly before competition season, sizing up may sometimes be appropriate. However, excessive room can affect appearance and comfort.

Evaluate Torso Length

Gymnastics leotards are heavily influenced by torso measurements.

Athletes with longer torsos often present one of the biggest sizing challenges for coaches. While some brands require these athletes to size up, we offer a Long Torso option that adds length where it’s needed without forcing gymnasts into a larger overall size.

This helps athletes achieve a more comfortable fit while maintaining the intended look and performance of the leotard.

Consider Athlete Preference

Some gymnasts prefer a compressive fit, while others prefer slightly more room. Comfort should always remain part of the conversation.

Competition vs. Training Use

Competition leotards are often expected to have a more precise fit, while training garments may allow slightly greater flexibility.

Whenever possible, a physical fitting remains the best way to resolve sizing uncertainty.

Sizing Mistakes We See Most Often (And How to Avoid Them)

After working with gymnastics teams across the country, we’ve noticed several recurring sizing mistakes.

Mistake #1: Ordering Based on Street Clothing Sizes

Every apparel category fits differently. Always evaluate gymnastics-specific sizing rather than everyday clothing sizes.

Mistake #2: Measuring Without Consistency

Different people measuring athletes often produce different results. If measurements are used, follow a standardized process.

Mistake #3: Ignoring Growth Spurts

Youth athletes can change size surprisingly quickly. Consider timing between fitting sessions and delivery dates.

Mistake #4: Choosing Sizes Too Quickly

If an athlete is clearly between two options, encourage them to try both. A few extra minutes during fitting can prevent future issues.

Mistake #5: Skipping a Formal Sizing Session

Teams that organize a structured fitting process typically experience fewer sizing concerns later. The more systematic the process, the better the outcome.

The Best Team Leotard Sizing Strategy Is the One That Removes Guesswork

Ordering custom uniforms doesn’t have to be stressful.

The most successful gymnastics programs treat sizing as a process rather than a quick administrative task.

A structured fitting session, accurate records, and physical sample garments dramatically reduce the likelihood of sizing issues later.

If you’re currently evaluating custom team gymnastics leotards, taking the time to implement a reliable sizing process can save hours of frustration and help ensure athletes feel confident when their uniforms arrive.

Ready to simplify team sizing? Request a free sample and ask about our sizer kit process, or explore our custom team gymnastics leotards to learn more about how we support coaches from design approval through final delivery.

How to Talk to Parents About Uniform Costs Without Losing Trust

Uniform season is exciting for coaches. For some parents, it’s stressful. And if that conversation isn’t handled well, it can create friction that affects your whole program culture. Here’s how to lead it with clarity and confidence.

Lead With Purpose, Not Price

Before you mention a dollar amount, anchor the conversation in why uniforms matter.

  • Uniforms build identity.

  • They signal belonging.

  • They carry your program’s values onto the floor.

When parents understand that, cost becomes an investment, not an expense.

Be Transparent About the Timeline

Surprises create resentment. Clarity creates trust.

Give parents:

  • A firm order deadline

  • A payment deadline with options if possible

  • A clear breakdown of what they’re getting

  • An honest explanation of why custom costs more than generic

Most parents are reasonable when they’re informed early.

Create a Simple FAQ

Answer common questions before they’re asked:

  • Why custom and not off the shelf?

  • Can we reuse the leotard next season?

  • What if my athlete changes sizes?

  • Is there a payment plan?

A one-page document shared at the beginning of the season eliminates most of the uncomfortable back-and-forth later.

Acknowledge the Investment

Don’t minimize cost. Acknowledge it.

“We know this is an investment. We chose custom because we want every athlete to feel proud wearing this, not just this season — but every time they put it on.”

That sentence does more than a discount.

When Parents Feel Heard, Programs Run Smoother

Uniform conversations are leadership moments. Handle them with the same intentionality you bring to training.

Because a parent who understands the vision doesn’t just pay the invoice. They become an advocate for your program.

What Happens Behind the Scenes When You Order Custom Uniforms

Ordering custom uniforms isn’t clicking “Add to cart.” It’s a multi-stage process. Understanding it reduces unrealistic expectations, and builds better timelines.

Stage 1: Design Development

  • Concept creation

  • Color matching

  • Logo placement refinement

  • Revision rounds

Stage 2: Fabric Preparation

  • Printing

  • Panel cutting

  • Fabric inspection

Stage 3: Embellishment (If Applicable)

  • Stone placement

  • Heat-setting

  • Inspection

Stage 4: Assembly

  • Sewing

  • Reinforcement stitching

  • Stretch testing

Stage 5: Quality Control

  • Size verification

  • Seam inspection

  • Final packaging

Each step adds value and time. Custom is not slower because it’s inefficient. It’s slower because it’s intentional.

How to Incorporate Your Gym Logo Into Custom Leotard Designs Without Compromising Style

Your logo is more than a graphic. It represents your program’s reputation, history, and identity. But when it is poorly integrated into a leotard design, it can overpower the look, distort under movement, or lose clarity in competition photos. Here is how to do it right.

1. Scale Strategically

Bigger is not always better. While visibility matters, oversized logos can disrupt the balance of a design or compete with graphic elements.

When determining scale, consider:

  • Competition visibility from a distance

  • How the logo will appear in action photography

  • Panel structure and seam placement

  • How the design flows with body movement

A logo should feel integrated, not placed on top. Well-scaled logos elevate professionalism. Oversized logos can unintentionally make a design look unbalanced.

2. Placement Zones That Work

Logo placement must account for stretch zones and movement.

Best practice placements often include:

  • Upper chest

  • Side hip panel

Avoid high-stretch distortion areas such as lower torso curves or extreme flex zones. When a logo stretches unevenly, it can warp the brand image and reduce visual clarity. Placement should protect both performance and identity.

3. Embroidery vs Sublimation vs Stones

The application method is just as important as placement. Each option has advantages and limitations.

Embroidery

  • Premium and textured appearance

  • Adds structure and visual depth

  • Heavier than other methods

  • Not compatible with all high-stretch fabrics

Embroidery works well on warm-ups and certain practice pieces but must be evaluated carefully on performance leotards.

Sublimation

  • Lightweight and flexible

  • Durable and long-lasting

  • Excellent for training leos

  • Integrates seamlessly into the fabric

However, sublimation cannot be applied to all fabric types and may have limitations depending on base material selection.

Stone Logo

  • Highly eye-catching

  • Popular for competition leotards and warm-ups

  • Creates elevated visual impact

  • Requires longer production time

Crystals require proper care. Without appropriate washing and handling, stones may loosen over time. Placement must also account for stretch zones to maintain durability.

4. Match the Method to the Purpose

Before choosing an application method, ask:

  • Is this for daily training or competition?

  • What is the timeline?

  • What is the durability expectation?

  • Does this align with our overall brand aesthetic?

A logo choice should reflect your program identity and operational realities. The most effective branding decisions are strategic, not emotional.

To conclude, a well-integrated logo enhances your design. A poorly integrated logo distracts from it. When scale, placement, and application method are aligned, your logo becomes part of the story your athletes carry onto the floor. And that story should always look intentional.

The Financial and Strategic Advantage of Cohesion

Brand consistency is not just aesthetic. It is revenue-aligned.

When you intentionally design cohesive merch that reflects your program’s identity, you create:

  • Merch desirability

  • Parent purchases

  • Social media shareability

  • Sponsor appeal

  • Additional program income

But there is another side that many programs overlook. If you do not offer official merch options, families will often create their own.

It may be well intentioned. But when that happens:

  • Colors may not match

  • Logos may be distorted

  • Fonts may change

  • Brand elements may be used inconsistently

Suddenly, your program’s visual identity is being shared publicly without structure or guidelines. And once that happens, you lose control of how your brand is represented.

Brand dilution does not happen overnight. It happens in small, inconsistent decisions. By offering official, cohesive merch, you are not just generating income. You are protecting your brand. You are defining how your program appears in:

  • Photos

  • Social media

  • Competitions

  • Community events

That level of control signals leadership.

Branding Is Positioning

Cohesive uniforms are about positioning your brand.

They can make your program feel larger than it is.
More established than it is.
More competitive than it is.

And when families proudly wear official merch that aligns with your visual identity, they amplify your brand exactly the way you intended.

Branding is powerful even in our personal lives. We are constantly presenting who we are to the world.

So why wouldn’t we intentionally build a brand for our team that communicates who we are, what we value, and where we are going? Because in sports, identity is not just seen. It is felt. And when it is protected intentionally, it becomes an asset.

Why Most Teams Reorder Uniforms Late And How to Plan a Stress-Free Season

Every season, it happens.

Teams realize too late that:

New athletes joined
Sizes changed
A replacement leo is needed
Warm-ups weren’t reordered

Late reorders are rarely about poor leadership.
They are about invisible timeline killers that most programs underestimate.

Let’s break them down.

Timeline Killer #1: Parent Delays

Parents do not delay intentionally. But in reality:

Payment collection takes time
Size confirmations require follow-ups
Athlete roster changes happen late

Even the most organized programs experience this.

Solution
Set your internal parent deadline at least two weeks before your actual deadline. This buffer protects you from last-minute stress and gives you room to solve unexpected issues calmly.

Timeline Killer #2: Underestimating Production Time

Custom does not mean quick.

Custom means:

  • Fabric sourcing

  • Printing

  • Panel cutting

  • Sewing

  • Embellishment

  • Quality control

For standard custom production, plan for approximately 6 weeks.
With crystals, plan for 8 to 10 weeks.

If you reorder three weeks before competition, there is no operational shortcut that can compress craftsmanship without compromising quality.

Production timelines are not flexible because they involve multiple specialized stages. The earlier you plan, the more control you maintain.

Timeline Killer #3: Approval Loops

Design revisions, logo adjustments, athletic director approvals, and internal decision-making all add days.

Back-and-forth emails like:

Please make the logo larger.
Now invert the colors.
Now remove the line on the left.

Each small change resets part of the process.

We offer three rounds of adjustments. To use them strategically, gather all feedback internally first and submit consolidated revisions. This reduces delay and keeps momentum.

One thoughtful revision round is faster than five reactive ones.

The Reverse Planning Method

Instead of thinking, “We still have time,” reverse-engineer your season.

Start with your competition date.

Add one week for shipping buffer.
Add 6 to 10 weeks for production.
Add 2 weeks for parent collection and size confirmation.

That date is your true order deadline.

Build backwards. Not emotionally. Operationally.

Stress-Free Season Means Predictable Systems

Great coaches do not eliminate problems.
They eliminate surprises.

Uniform planning is not just ordering apparel. It is risk management for your season.

When you plan early, uniforms stop being a stress point.
They become one less variable in a high-pressure environment.

And that is where confident programs are built.

Why great custom apparel takes time

Custom team apparel design process — Bold&Grit Team blog

A look at every step of our custom design and manufacturing process, and why each one matters.

When a coach reaches out to us with a vision, what follows is not a quick order, it’s a carefully crafted journey. Custom apparel is not off-the-shelf. Every piece is born through a series of deliberate, hands-on steps designed to ensure the final garment is exactly right. Here’s what that process actually looks like.

For teams starting with leotards, our custom gymnastics leotards process follows the same careful approach, from the first design brief to the finished pieces arriving at your gym.

Custom team apparel design process — Bold&Grit Team blog

The Brief
Colors, logos & the first conversation

Every project begins with the coach sharing their brand identity: their team colors, logo, and a general sense of what they’re envisioning. This is the foundation on which everything else is built — the clearer and more detailed this brief, the smoother the journey ahead.

Design
Three proposals. Three rounds of refinement.

Our design team develops three distinct graphic proposals, each exploring a different visual direction, so the coach has real options to react to. This isn’t just about looks; it’s about translating a brand’s personality into something that can actually be worn and felt.

Once a direction is chosen, the real dialogue begins. We offer three rounds of adjustments: the coach shares their feedback, the design re-enters our workflow queue, and the revision is executed with care. Then we do it again, if needed. Each round is a chance to get closer to the vision, tightening the color balance, repositioning a graphic element, perfecting the proportions, until the design feels exactly right.

Three rounds isn’t a limit, it’s a rhythm. It gives the process the space it needs without losing momentum.

Pattern Making (when needed)
When a new silhouette is born

When a coach asks for something we don’t already have in our existing lineup, a unique back panel, a new neckline, an original cut, the design doesn’t go straight to production. First, it goes to pattern making.

Our pattern team translates the design sketch into a technical reality: they develop a master pattern, create a physical sample, and then grade the pattern across every size. This is one of the most time-intensive stages, but it’s what makes a truly original garment possible.

Once the coach approves the physical sample, we’re ready to move into full production.

Production
Where craft meets precision

Production is where the design becomes real, and it involves multiple specialized processes happening in careful sequence:

Sublimation — Full-color, high-definition graphics are permanently fused into the fabric. This is what gives our pieces their vibrant, long-lasting prints.

Cutting — Each piece is cut according to the approved patterns, with care taken at every step to ensure precision and minimize waste.

Embroidery — Logos, lettering, and decorative elements are stitched with high-quality thread for a premium, dimensional finish.

Sewing & construction — the most complex stage — This is where everything comes together, and it is the stage that demands the most skill, patience, and attention to detail. It’s not enough for a garment to look like the design on screen. It has to be the design, in three dimensions, on a body that moves.

This means making sure every sleeve has the right length and ease, not too tight, not floating. It means engineering necklines that slip over a leotard smoothly without pulling or distorting. It means perfecting the seams where different fabrics meet, where a matte panel transitions into a shiny mesh, or where a structured band meets stretch fabric, so the result looks seamless, intentional, and stunning.

None of this can be rushed. Every piece is assembled by hand, inspected at each step, and corrected before moving forward. This artisanal approach is what ensures that what the athlete puts on looks exactly like what the coach approved.

The final layer: rhinestones, beading, and embellishments placed by hand, because the details that catch the light are often the ones that catch the eye of a judge.

Every extra day in our process is a day spent ensuring
the garment is exactly what it should be.

So… why does it take time?

Because behind every finished garment is a full creative and technical journey: a design team that explores options, a pattern team that makes new ideas structurally possible, and a production floor where skilled hands do the work that machines simply can’t replicate.

Custom apparel is not a commodity. It’s a commitment, from us to you, and to the athletes who will wear it. When you choose custom, you’re choosing care, craft, and something that was made with you in mind from the very first stitch.

We think that’s worth it. And we think you will too.

In Equestrian Sports, Your Uniform Is Competing Too And It Can Help You Win

Equestrian athlete wearing custom riding uniform — Bold&Grit Team blog

What we saw at Copa Gobernadora

We recently had the opportunity to attend Copa Gobernadora in Puerto Rico, and if there’s one thing that stood out, it’s this: equestrian sport is experienced with a level of intensity and respect that’s truly unique.

Beyond the competition itself, it was a space to connect with coaches and riders from different countries. Different styles, different teams, but all sharing one thing in common: a deep love for the sport.

And something became very clear, again and again: elegance in equestrian sports is not optional. It’s part of the discipline. It’s not just about technique or the connection with the horse. It’s also about how the rider presents themselves in the arena.

Equestrian athlete wearing custom riding uniform — Bold&Grit Team blog

The uniform is no longer just a requirement

Through our conversations with coaches, we noticed an important shift. Many are no longer seeing uniforms as something they simply “have to wear,” but rather as part of overall performance.

The level of competition has evolved. There is more preparation, higher expectations, and greater attention to detail. In that context, presentation plays a role in how athletes are perceived—by judges, by teams, and by the audience.

When the uniform actually adds value

Teams that are performing at a higher level have already understood something key: the uniform doesn’t just accompany performance, it enhances it.

This is not only about aesthetics. It’s about competing better. A well-designed uniform helps project discipline and professionalism, improves comfort and freedom of movement, builds a strong team identity, and creates a clear visual presence in the arena. In a sport where every detail communicates something, this matters more than many realize.

What makes a great equestrian uniform?

This is where the difference becomes noticeable. Not all uniforms are created equal, and in equestrian sports, they need to meet three essential criteria.

First, functionality. The sport demands precision, and every adjustment matters. Fabrics need to adapt to the rider’s movement without restriction, provide breathability during long days, and support proper posture. When a garment is uncomfortable, it doesn’t just distract—it can directly impact performance.

Second, durability. Equestrian sport is far from static. There is constant friction, exposure to changing weather conditions, and intensive use. A high-quality uniform must maintain its shape, color, and structure over time.

Third, intentional design. This is where teams truly stand out. A cohesive visual identity communicates order, confidence, and professionalism. Even if it’s not explicitly stated, these elements influence how a rider and their team are perceived in the arena.

What changes when the uniform is at the right level

In practice, the difference is clear. Riders feel more confident when they are comfortable and well-presented, which directly impacts how they enter the arena. Teams become more cohesive, shifting from a group of individuals to a unified presence.

There is also a noticeable improvement in how they are perceived during competition. In equestrian sports, aesthetics and technique coexist, and presentation can make a subtle yet powerful difference.

Most importantly, riders are able to focus fully on their performance. Less discomfort means better concentration, and in a precision-based sport, that is critical.

What we’re building at Bold&Grit

After experiences like Copa Gobernadora, one thing is clear: equestrian sports are ready to evolve, and that includes what athletes wear.

At Bold&Grit, we don’t work from templates. We design each uniform from scratch, taking into account the rider’s movement, the team’s needs, and the identity they want to project.

We work closely with coaches and clubs to create uniforms that don’t just look good, but perform in real competition settings.

It all comes down to this

In equestrian sports, elegance is not an extra. It is part of the discipline. And that elegance doesn’t happen by chance. It is built, trained, and designed.

So the question is not whether you need a uniform.

The real question is: Is your uniform helping you perform at your best?